This post is written by Stephen Parsons.
In my last post, I described my learning style and I promised to blog my progress as I explore a new technique through a new artistic production. The idea is to reflect on my learning process to see how it evolves and how it impacts development of my skills as an artisan.
The artistic vision, you might recall, is of a manta ray swimming majestically – maybe along a reef or sandy seabed. But the image is more impressionistic than realistic, crafted in light and dark wood and exhibiting a winged symmetry in my mind’s eye.
Research & Literature Review
True to my earlier musings on my learning process, I have spent a large amount of time exploring, researching, studying and asking questions – while, in this case, also recuperating from a serious bout of flu. So, the research has been good, but less actual work was achieved than I had hoped.
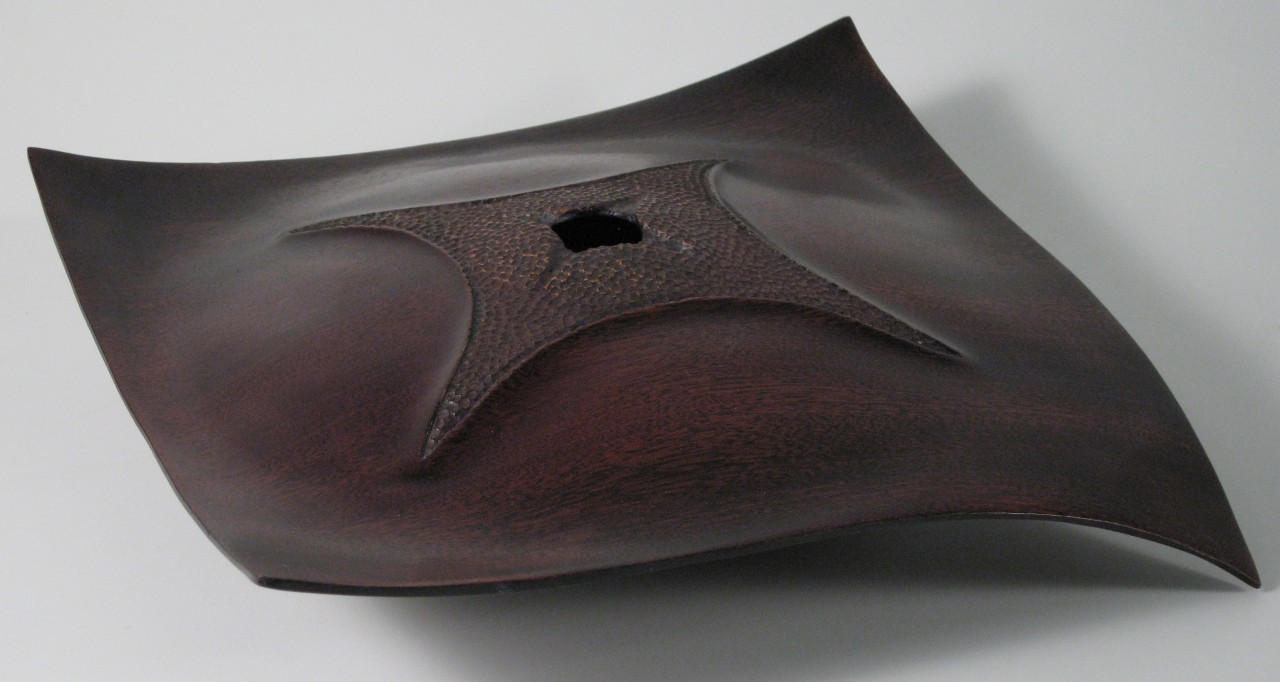
Manta Ray/ Starfish by Terry Scott
My mentors for this project include Terry Scott, a talented woodturner from New Zealand, who has made the turned manta bowl a signature piece. His technique has been copied by many. Fortunately, although he has not done a lot of YouTube videos, his technique has been really well documented in a number of forums. He does have a video out if you are interested, but I think I have the necessary inspiration and enough of a handle on that technique to feel comfortable with the basic steps and a few optional approaches.
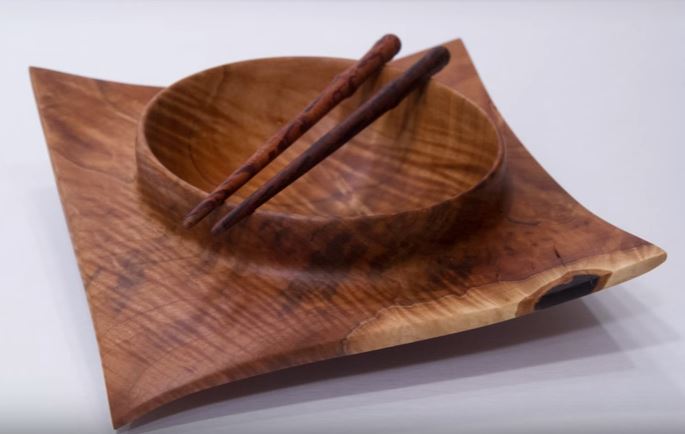
Winged bowl with chopsticks by Carl Jacobsen
Carl Jacobson (http://woodshoptv.com) has been instrumental in demonstrating the use of newer tools (including Easy Start tools like mine) in a piece like this and making me very comfortable with the task to come. I had a couple of exchanges with Carl who has been very generous with advice. His demonstration of turning a manta ray bowl on YouTube provides really great visual support which is critical to my learning style.
 Bob Hamilton’s work and highly detailed videos on winged vessels provides plenty of fundamentals to ground the theory. Basically winged turning refers to a form where – unlike typical woodturning that tends to focus on making square wood round – winged turning involves keeping the square shape and creating hollow forms and convex and concave space within that structure.
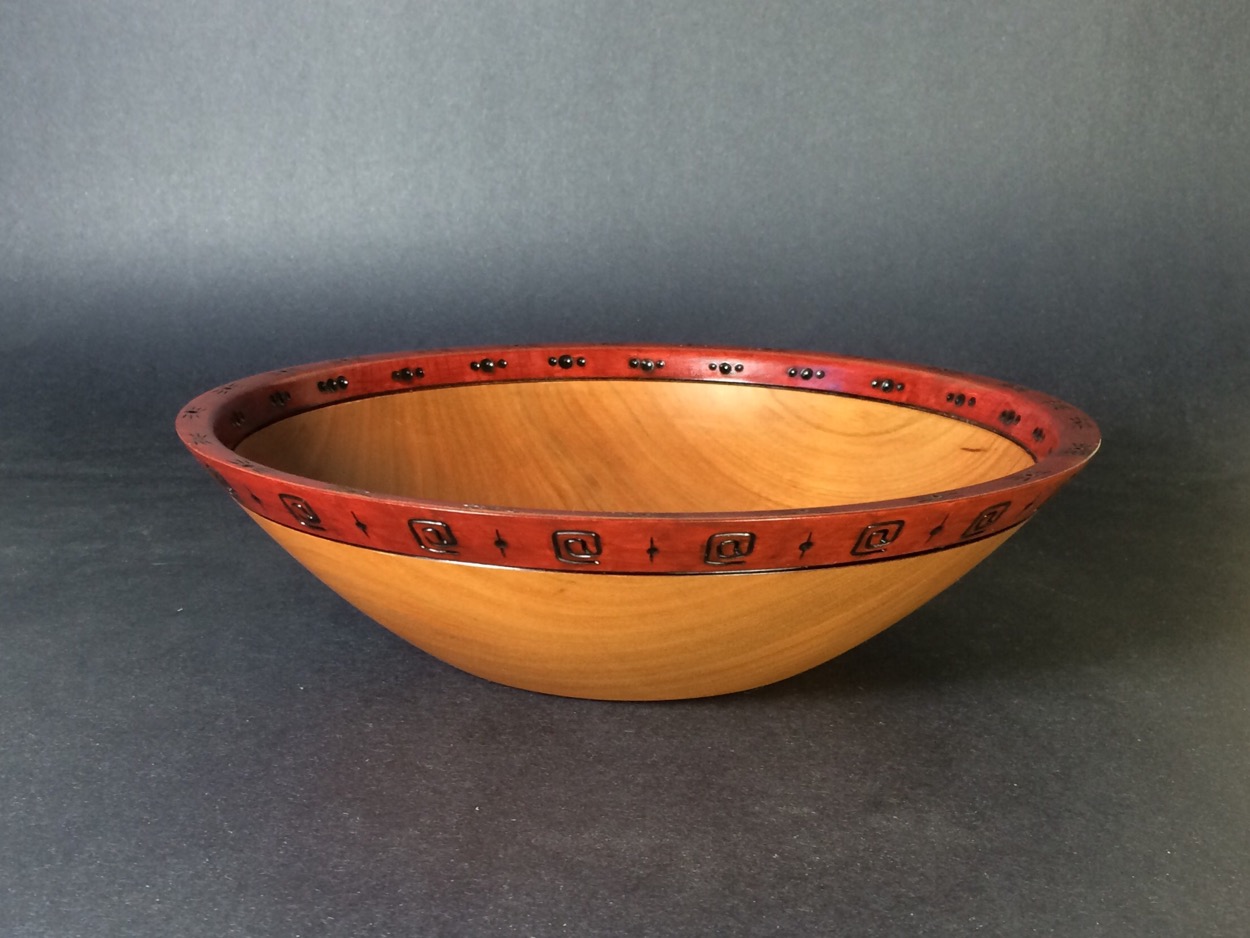
Cherry Bowl – Ravenview Art & Craft
Finally, a local connection, Ted Monk – a woodworking artisan who operates Ravenview Art & Craft – recently presented a series of demonstrations at the Nova Woodturners Guild on finishing techniques that present plenty of ideas and inspiration for completing the look I want for my project. Ted – whose work is renowned for its beautiful finish – covered everything from mineral inlay to dyes, mechanical texturing and even pyrography. Several of his methods are of interest and I will seek his continuing advice and input as I continue my learning throughout this project.
Analysis and Planning
Although I have great respect for the skills of my mentors, I will still be seeking to do the project somewhat in my own style and using my own processes. Since I don’t seek to exactly copy anyone else’s work, why would I want to duplicate their technique? Artistic production welcomes, promotes, rewards and, perhaps, even demands the artist put their own signature not only on the finished piece, but also on the process of its creation. Once basic skill mastery is achieved, I am usually comfortable exploring further creativity within the genre and synthesis of new styles, designs, and approaches.
Small Steps
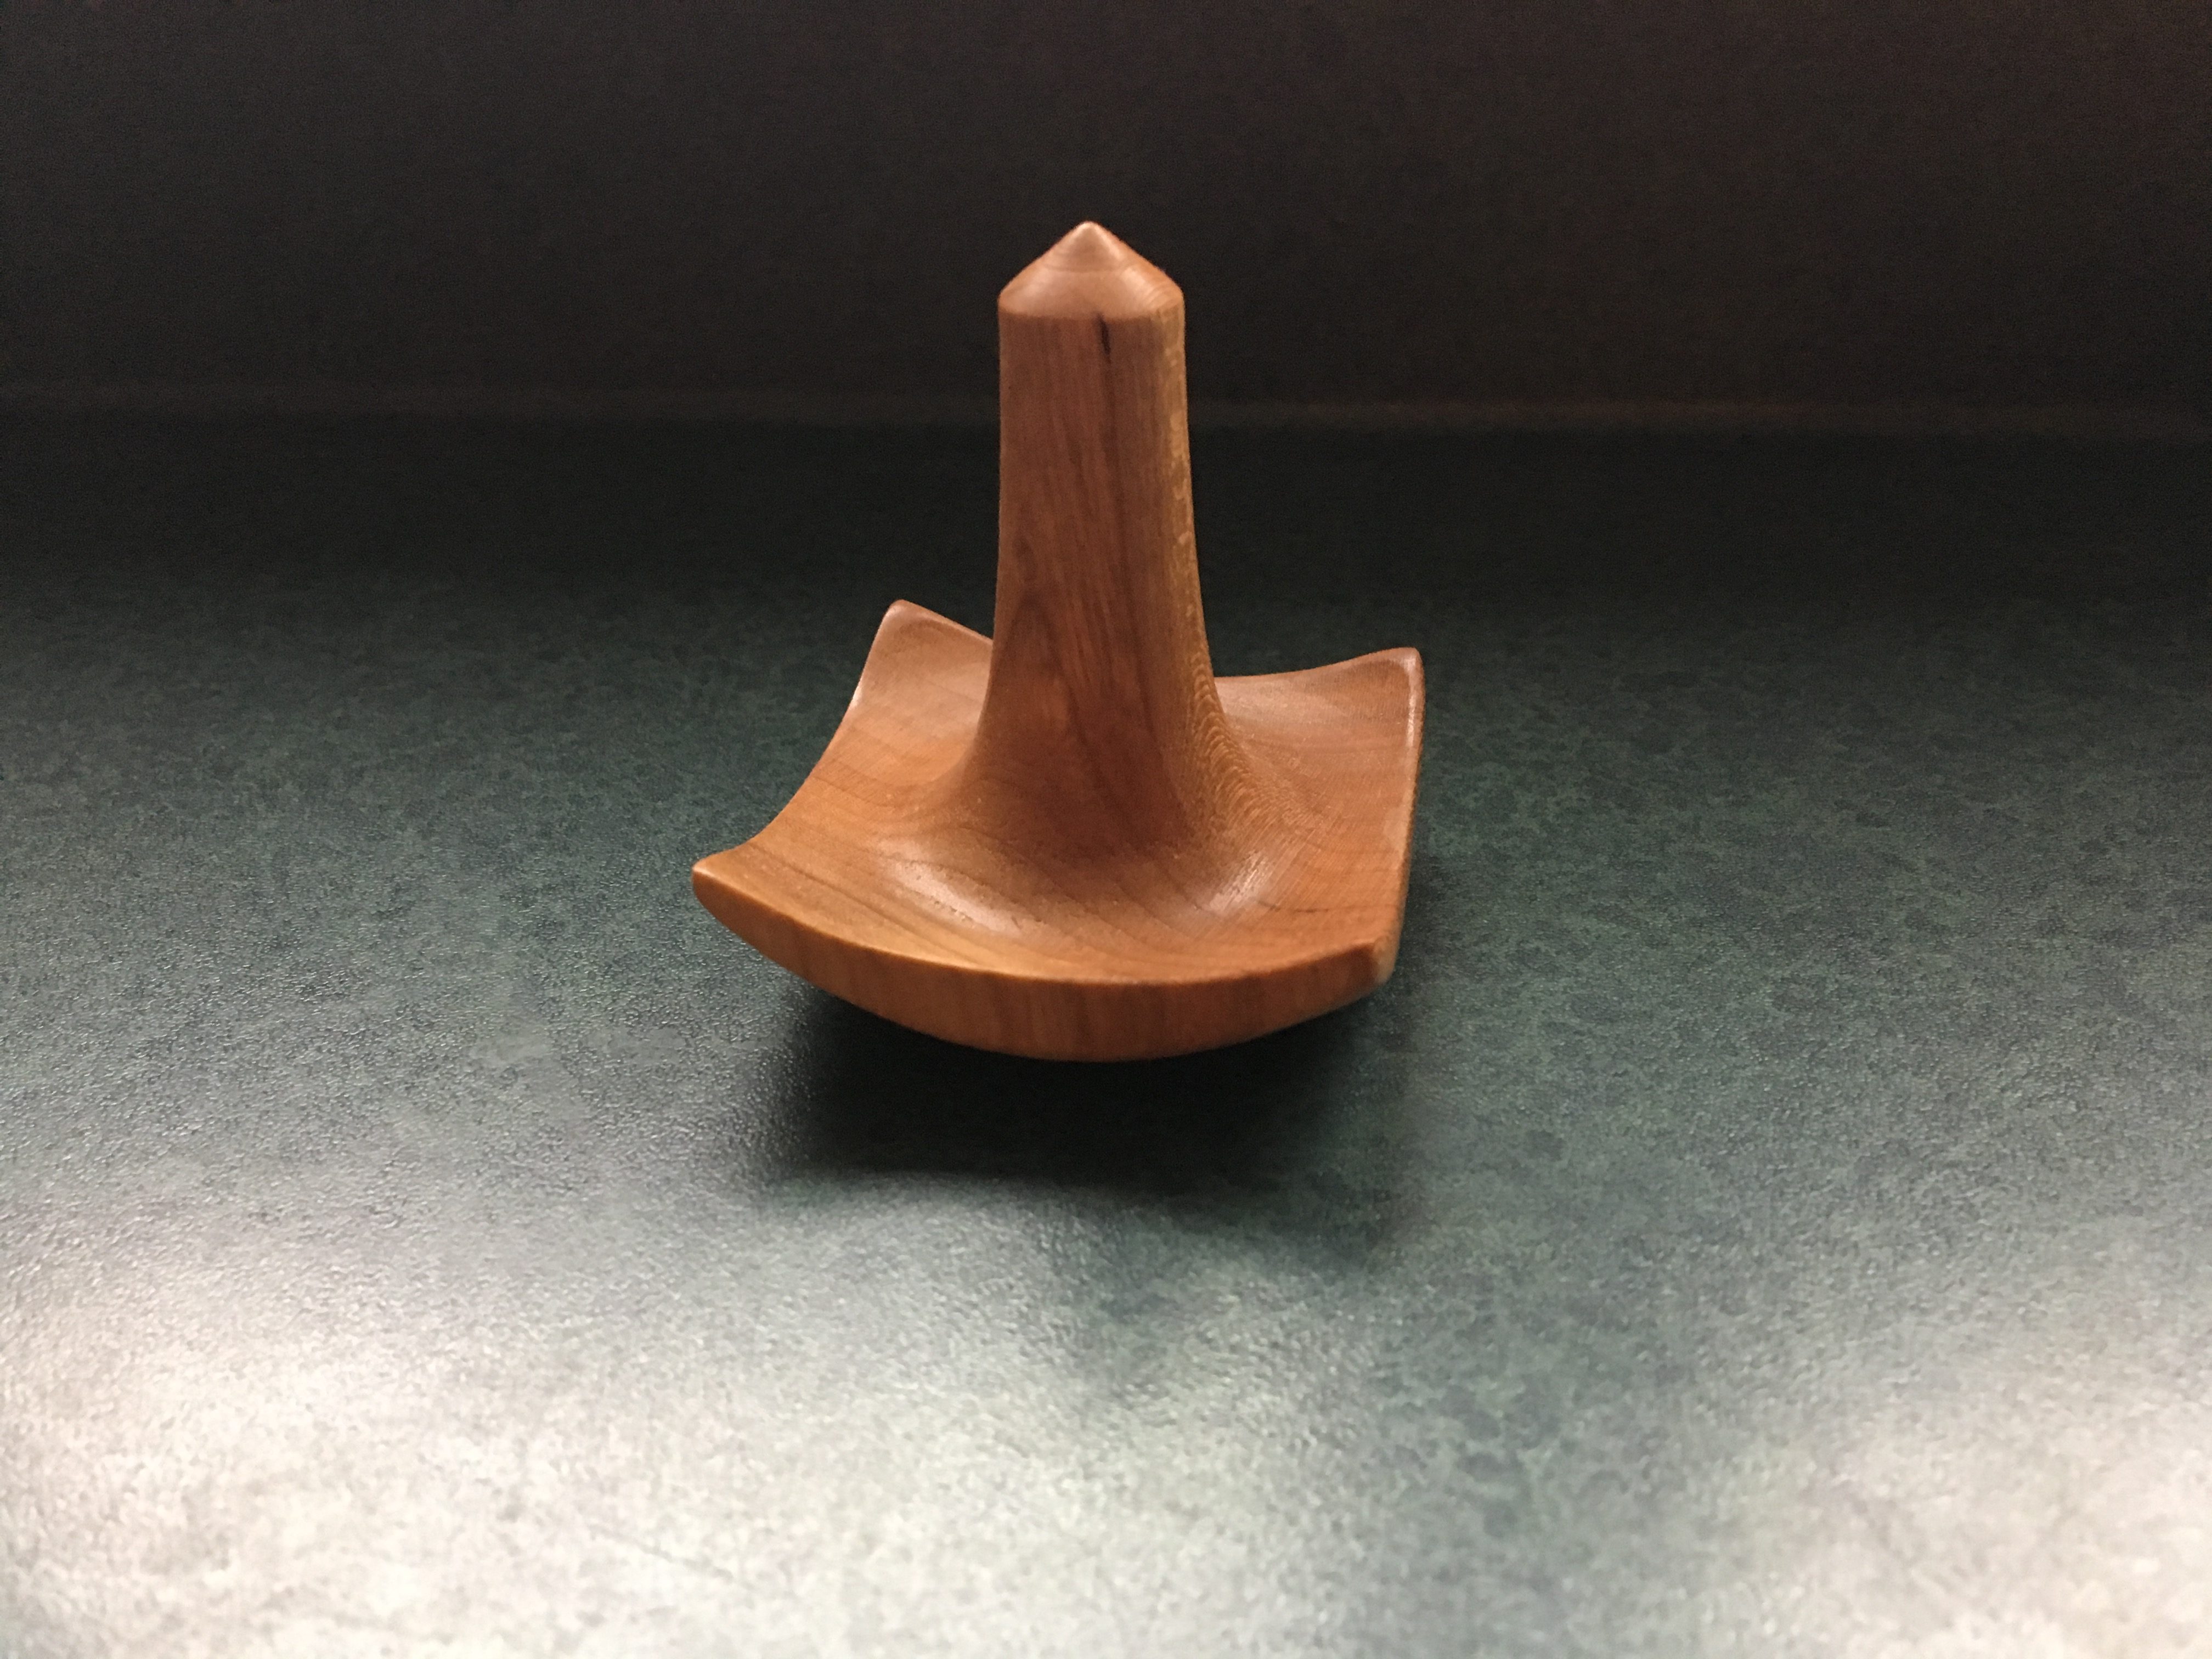
Ring-keeper by Stephen Parsons
What I failed to mention earlier about turning winged objects on the lathe is that it is a somewhat risky business. Lathe work in general can be a little scary even when you are using nice, well-balanced round spindles between centres. Once you start working with eccentric turning, off-balance live pieces and so on, you are basically addressing a high-speed off-balance rotational piece that without a lot of care can become projectile pretty quickly. In winged turning you have to be aware that as you reach the outer portions of the piece, you are working more in the air than on the wood and so stability and spinning sharp square edges have to be considered.
So I knew I needed to get at it – to turn a small winged vessel of my own. The result is this “ring-keeper”, a very simplistic representation of the winged vessel, and in this case limited to a two-inch by two-inch by four-inch space that provides little chance of harm.
I learned a lot and will reflect on that and discuss more in my next instalment, but for now I would say one of the most important things I learned is that it is not quite as scary as I feared as long as I take my time and use a high-speed setting on the lathe. A light touch, good basic technique, and good awareness of where your fingers are relative to the spinning piece is critical.
Next steps
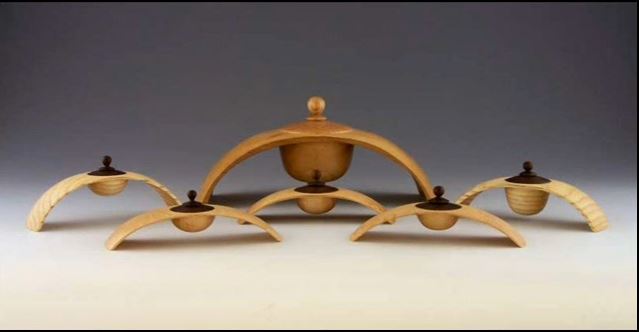
Small winged boxes by Bob Hamilton
Now that it looks like I might just survive this (now four-week) bout of influenza, my next challenge will be to try a few more winged vessels – probably beginning by attempting something similar to Bob Hamilton’s really fine work on the small winged bowl. I will also begin to scale up in terms of size and eventually attempt the two-tier up-and-down wings of the offset or eccentric turning that begins to change the balance and technical complexity. Meanwhile I will beg for some more time with Ted and begin to plan for the finishing techniques. Stay tuned…
Recent Comments