This article is written by Stephen Parsons.
In part I of this series I explained why jigs are so important to me as a woodworker. In this article I’d like to introduce you to my favourite jig, and if you’ve been paying attention to any of my recent posts, you’ll probably be able to guess that it is my box joint jig. It is by far the most complex piece of work I have done- not only in home-built tools but in any construction.
It was a challenging project but so geeky that it simply called out for me to build this for my shop. Here’s the low-down:

Mortise and tenon joint

Dovetail joint
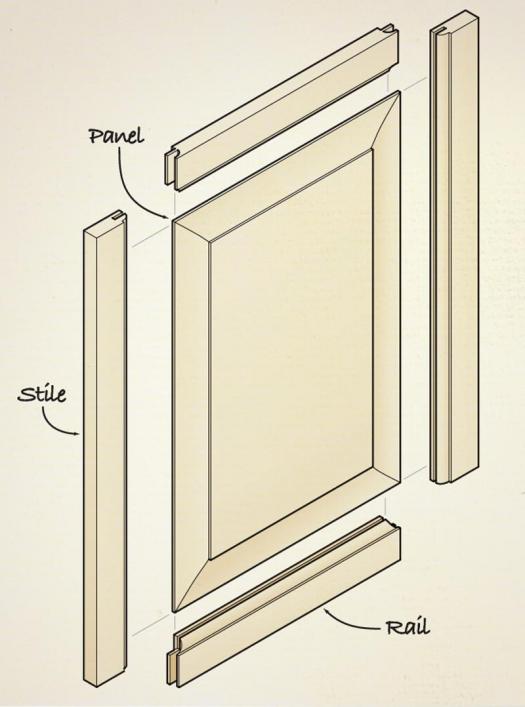
Rail & Stile
Issue/problem: Strong and attractive joinery is a must when building fine works that must stay together for a long time. Tenons, dovetails, and rail-and-style construction are all great examples of strong joinery that presents very well. But they are also very time-consuming, and require either a lot of specialized commercial tools and jigs, or a tremendous amount of time and attention to hand-cut the joinery. A great alternative is the box joint – not usually considered quite as pretty as the dovetail, but every bit as strong and with some imagination, capable of great innovation and attractive patterns. The most standard jig for doing box joints is a simple sled with a dado and a small “key” that allows you to make a cut, move the work on to the key then make another cut and so on, until the piece is complete. If you have to do any large number of boards to cut it is brutally repetitive and – with any kind of non-regular design – it risks material spoilage at the first point of inattention.
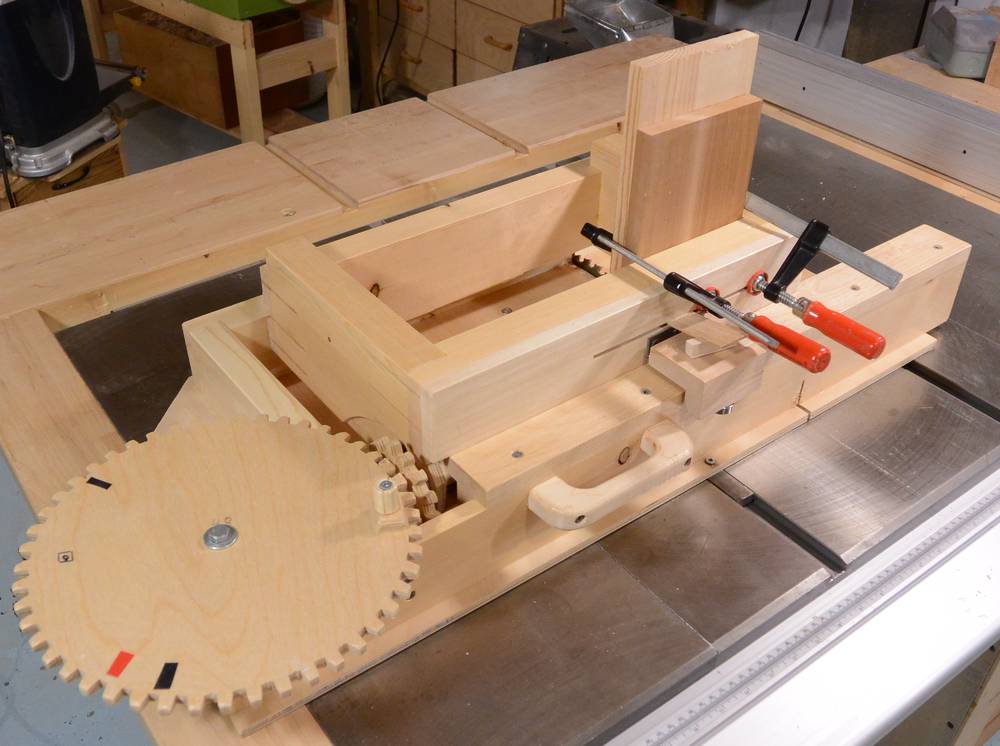
Solution: This box joint jig is based on Mathias Wandell’s Screw Advance Box Joint Jig, built nearly entirely of wood (the threaded screw and movement mechanism and some holding screws aside). First time I saw this I knew I was going to build it. I bought the plans from woodgears.ca and I have to say that of all the plans I have bought over the years, this is the best value I have ever gotten. Not only were there illustrated and dimensioned plans, but the plans included digital copies of the SketchUp file and printable templates of the major pieces. View the video to see how cool this thing is to work with – basically it solves my problem because: it allows me to do multiple pieces at a time (easily 4-6 pieces in the stock box depending on width); it is highly accurate and allows me some flexibility on joint tightness I can’t get on my basic key and dado jig; and it allows me to control the advance of the wood by simply turning a crank, including complex or irregular patterns.
Design/Build: I pretty much stayed with Wandell’s plans including the use of splines to strengthen the stock box. I used mostly off-the-shelf construction-grade lumber and standard hardware from our local (and very limited) country hardware store. I made the gears for the jig on my bandsaw, and all of the remaining pieces on either the bandsaw or table saw – no special tools needed at all (although if I had a box joint jig before I built it, I probably would have used it instead of the butt join and spline joinery for the stock box.)
Results: I am able to crank out many pieces at high accuracy and speed that I would otherwise have to take a long time to make; and yet, the work is attractive and strong. A couple of recent projects
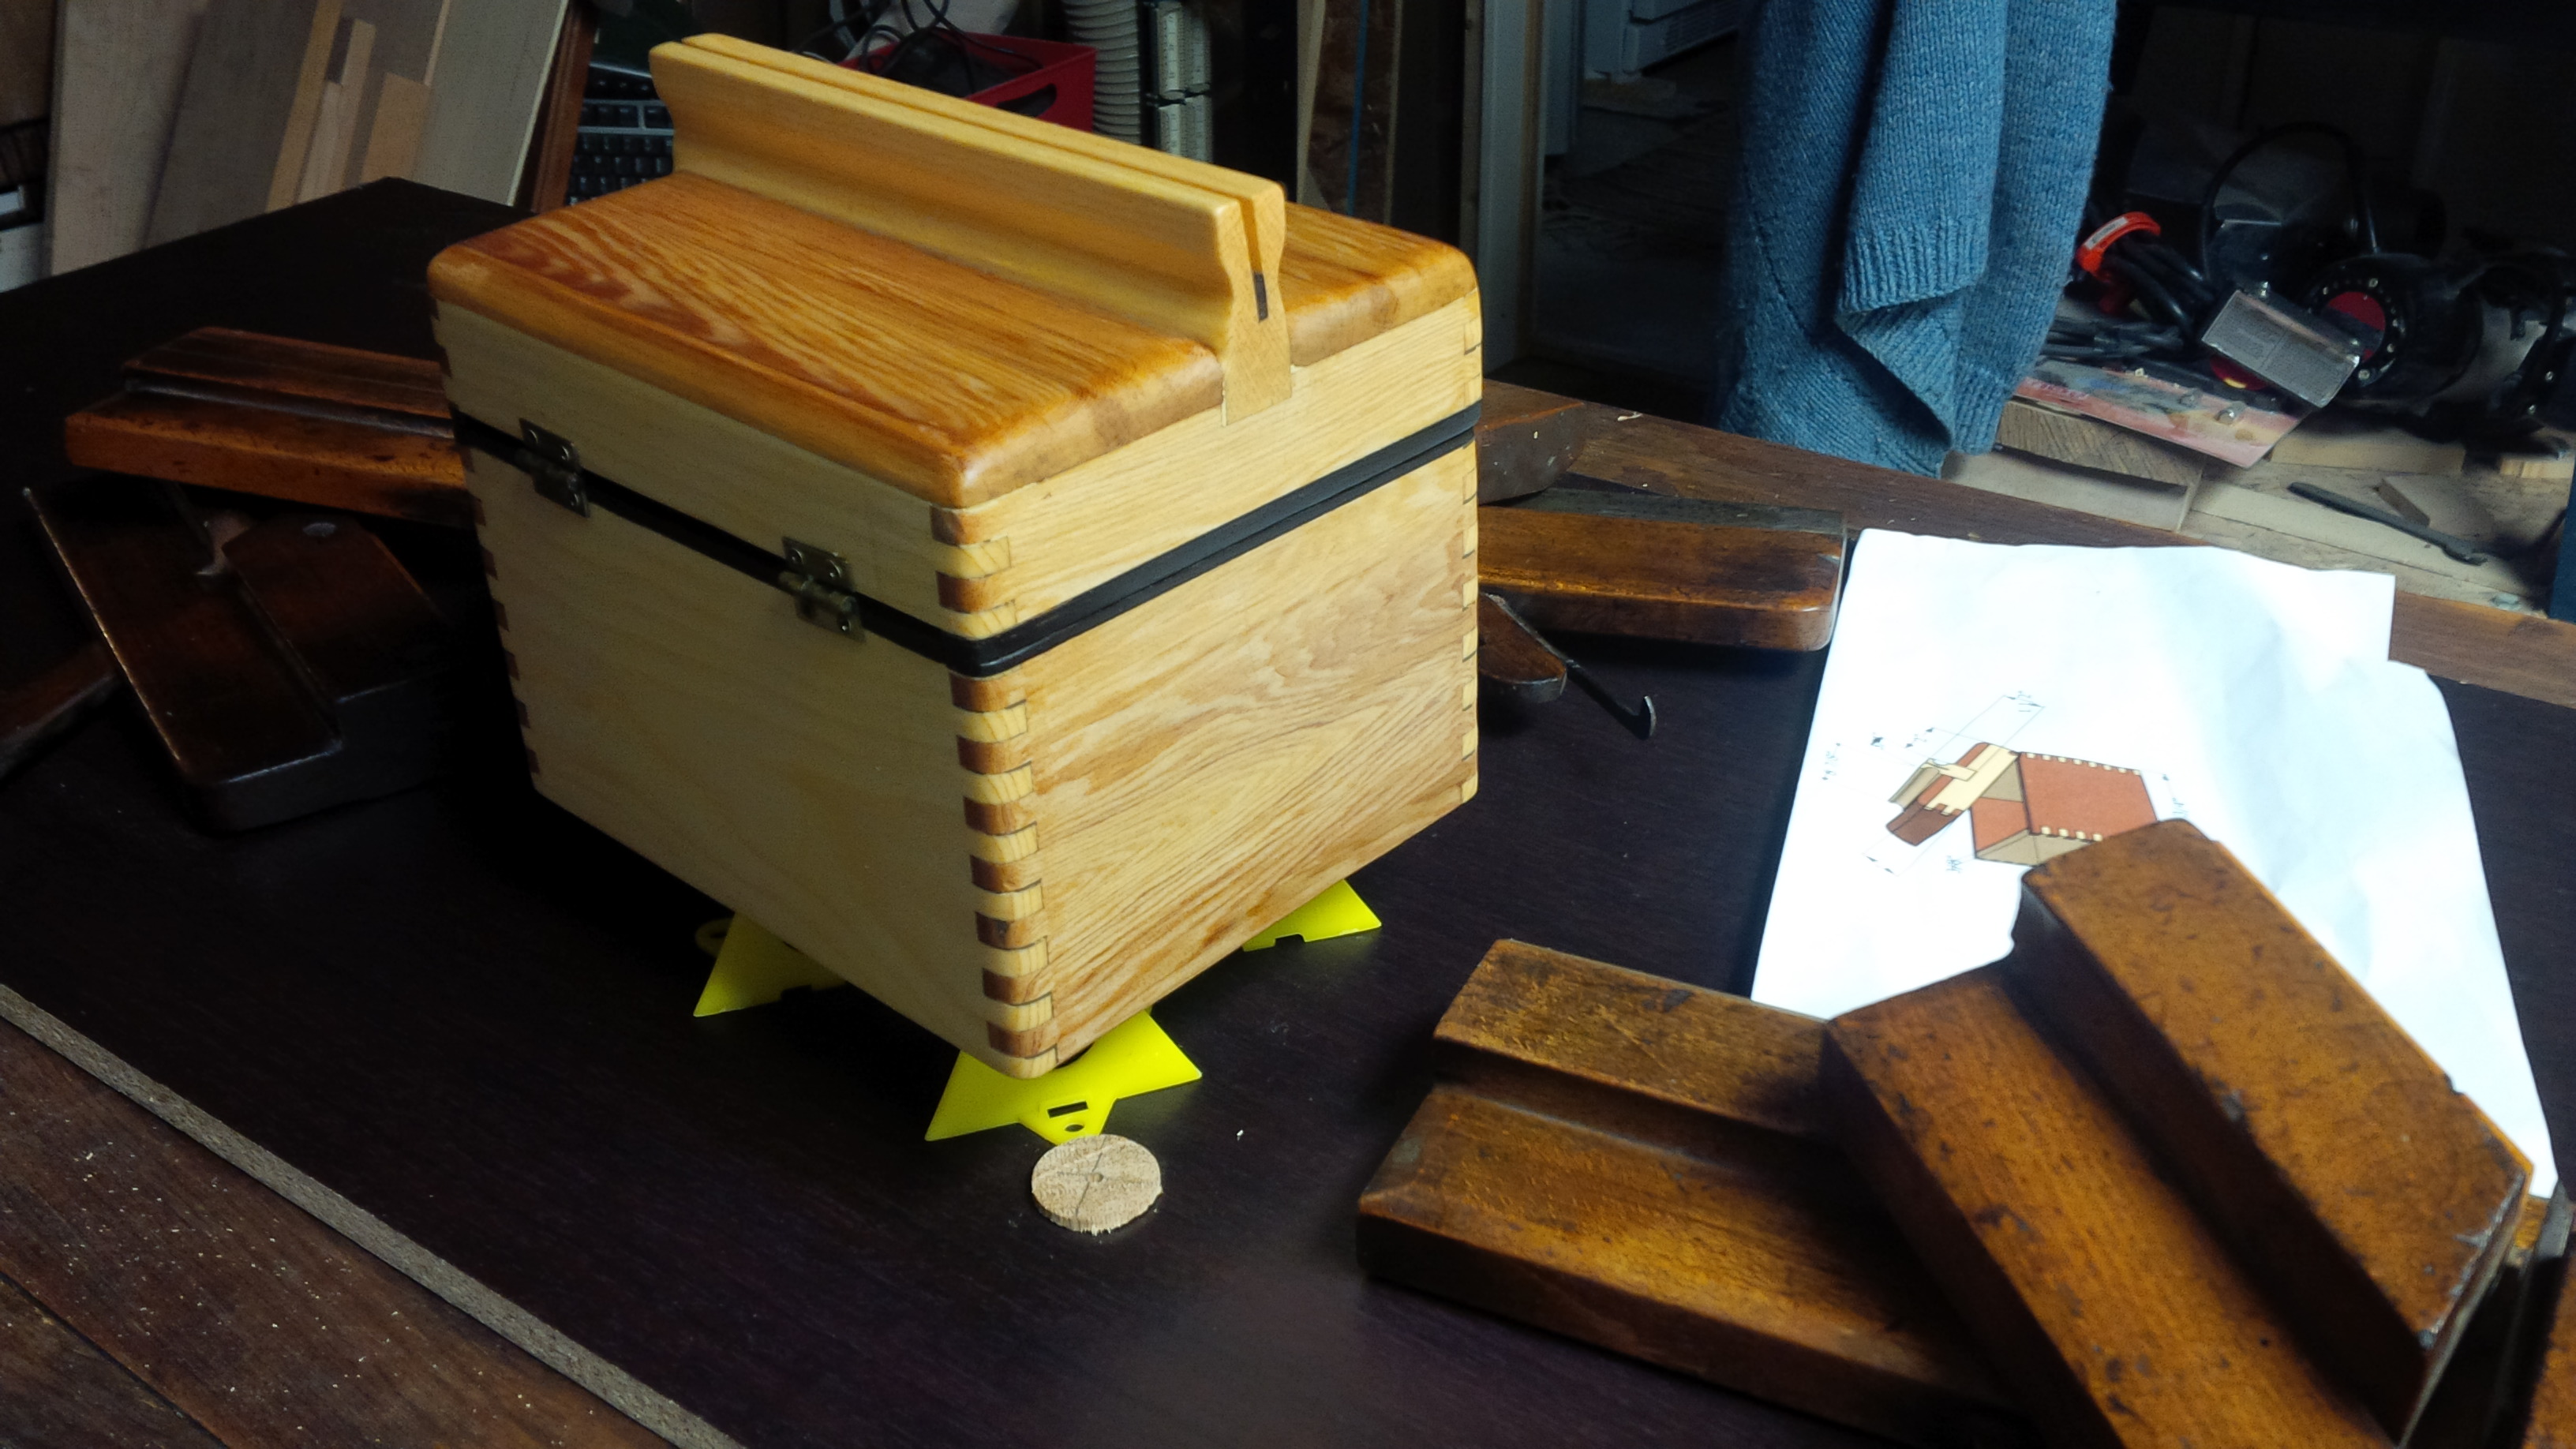
Recipe box – click for full size image
benefiting from this jig are my artist’s laptop desk and this pine-and-cedar recipe box. I think you’ll agree they both look attractive. The jig allowed me to do up to four boards at a time, saving me a ton of time and effort while maintaining really tight control on joint spacing.
Next in this series: The Joy of Jigs, Part III
Recent Comments