This article is written by Stephen Parsons.
Carrying on with a tour through my favorite jigs, I’d like to introduce one that is not fully built from scratch by me (unlike the box joint jig and table saw sled which I wrote about previously). My tenoning jig uses a combination of shop cut MDF panels, pre-built panels and miter guides from Incra Tools.
Issue/ Problem: Cutting tenons, especially with finer thicknesses of wood, can be a tricky exercise to complete by hand. Getting consistent tenons that line up nicely with matching mortises often leads to the production of a substantial amount of kindling.
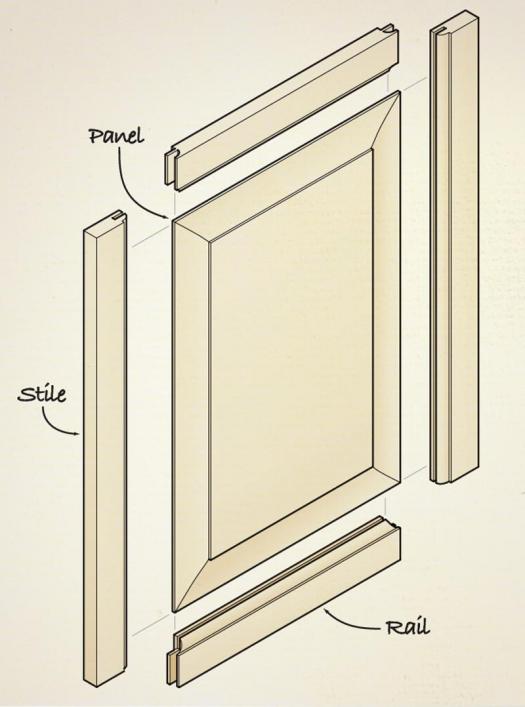
Rail and stile showing tenons on the rails and mortise slots on the stiles.
A perfect tenon must have even cheeks and haunches, and consistent depth or thickness of the tenon itself. Hand cutting usually requires a lot of fine and repetitive work with chisels and shoulder planes to complete the final stages of shaping the tenon. If you have lots of time, patience and a steady hand, hand-cutting tenons and mortises can be a rewarding experience.
But if you have numerous tenons to cut – such as in the production of rail and stile joinery for several cabinet doors, then anything that can automate the process is helpful. Mathias Wandel (woodgears.ca) provides a great solution with his slot mortising machine, but then Mathias is an engineer with an IQ around 140 and so this looks like child’s play for him – not so much for me! You could try to cut your tenons using your tablesaw fence or even a sled to pass your workpiece over a saw blade, but stability of the piece always seems to be a challenge.
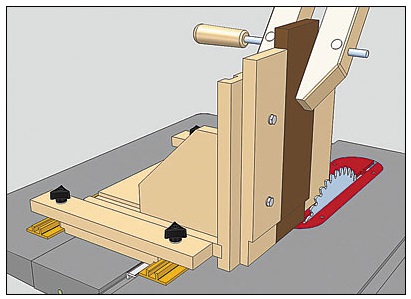
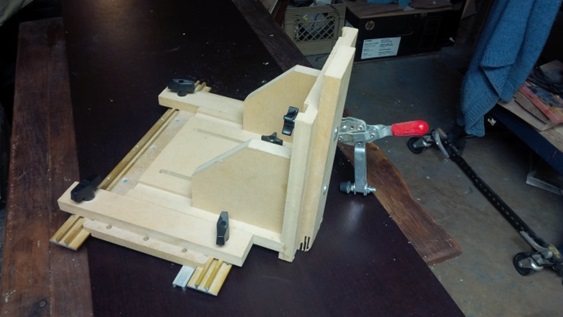
Illustration: Incra Tenoning Jig with handscrew clamp
Solution: Incra provides numerous “build-it” panels and parts that can be used to create all sorts of interesting jigs and machines. One that I came to appreciate is their design for a tenoning jig, so I bought the parts and built it. The jig rides on an aluminum slide that fits a standard 3/4″ miter slot. It has numerous adjustments for depth and alignment to the blade and can accommodate various methods for securing the workpiece while it is passing over the blade (such as the hold down toggle clamp you can see above or a handscrew clamp shown in this picture). This stability and the use of the miter slot for perfect parallel cuts to the blade are the secret to its value in producing quick, safe and consistent tenon cuts. Depending on the thickness of the workpiece, you may still need to use a saw sled to finish cutting the cheeks, but careful setup of your jig means you can reproduce the tenon perfectly everytime.
Design/Build: Instructions for building numerous jigs come with any of the build-it panels available from Lee Valley, Busy Bee Tools and other outlets. You will still need to be able to cut, rout,and drill your MDF panels for the various slots but the instructions contain very clear directions and templates for that work.Everything is joined together by the ingenious panel connectors and knobs, bolts and washers that provide the adjustments. Assuming you’ve got a bit of scrap MDF around you should be able to build this tenoning jig – including the hold-down clamp and a few T-track bolts and knobs – for under $100.
Results: Although I have also come to appreciate my new built-in router table with a rail and stile cutting attachment or flush-trim bit for tenon cutting, this jig is still a favourite for narrower boards or creating consistent lap joints and similar work where you need to cut across end grain to carve away part of a board end. One of the most recent projects that employed my tenoning jig to create a rail-and-stile type of cabinet door for a thread cabinet that we are developing in collaboration. More on that later in the week.
I used this same jig to set up the mortise and tenons for the breadboard ends of my artist’s laptop desk. It’s a very versatile tool and I am looking forward to learning even more about its many uses.
Recent Comments