This post was written by Mary Elizabeth O’Toole
While preparing my recent post on Taming Your Stash, I decided I should follow my own advice and do a review of projects that I have in various stages of completion. That inventory includes several small tables. Since I haven’t been in the wood shop enough lately, I thought it was time to assess one of my table projects for this work-in-progress update. More importantly, it is time to set a work plan to finish one them. I chose to start with a small side table.
This is something that I started a few years ago as a part of a furniture making course at the Nova Scotia Centre for Craft and Design.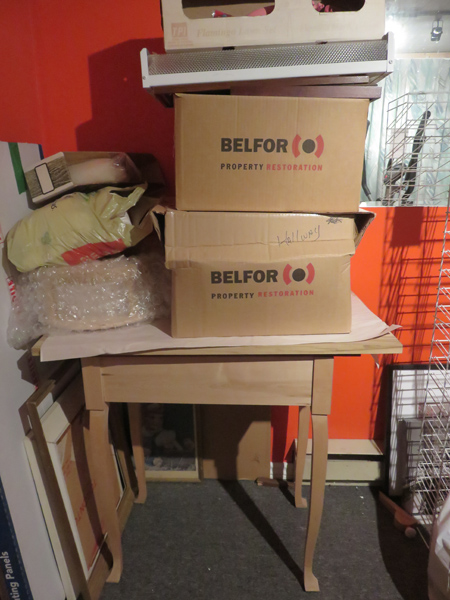 I am not even sure how long ago it was but it is definitely time to get this W.I.P completed.
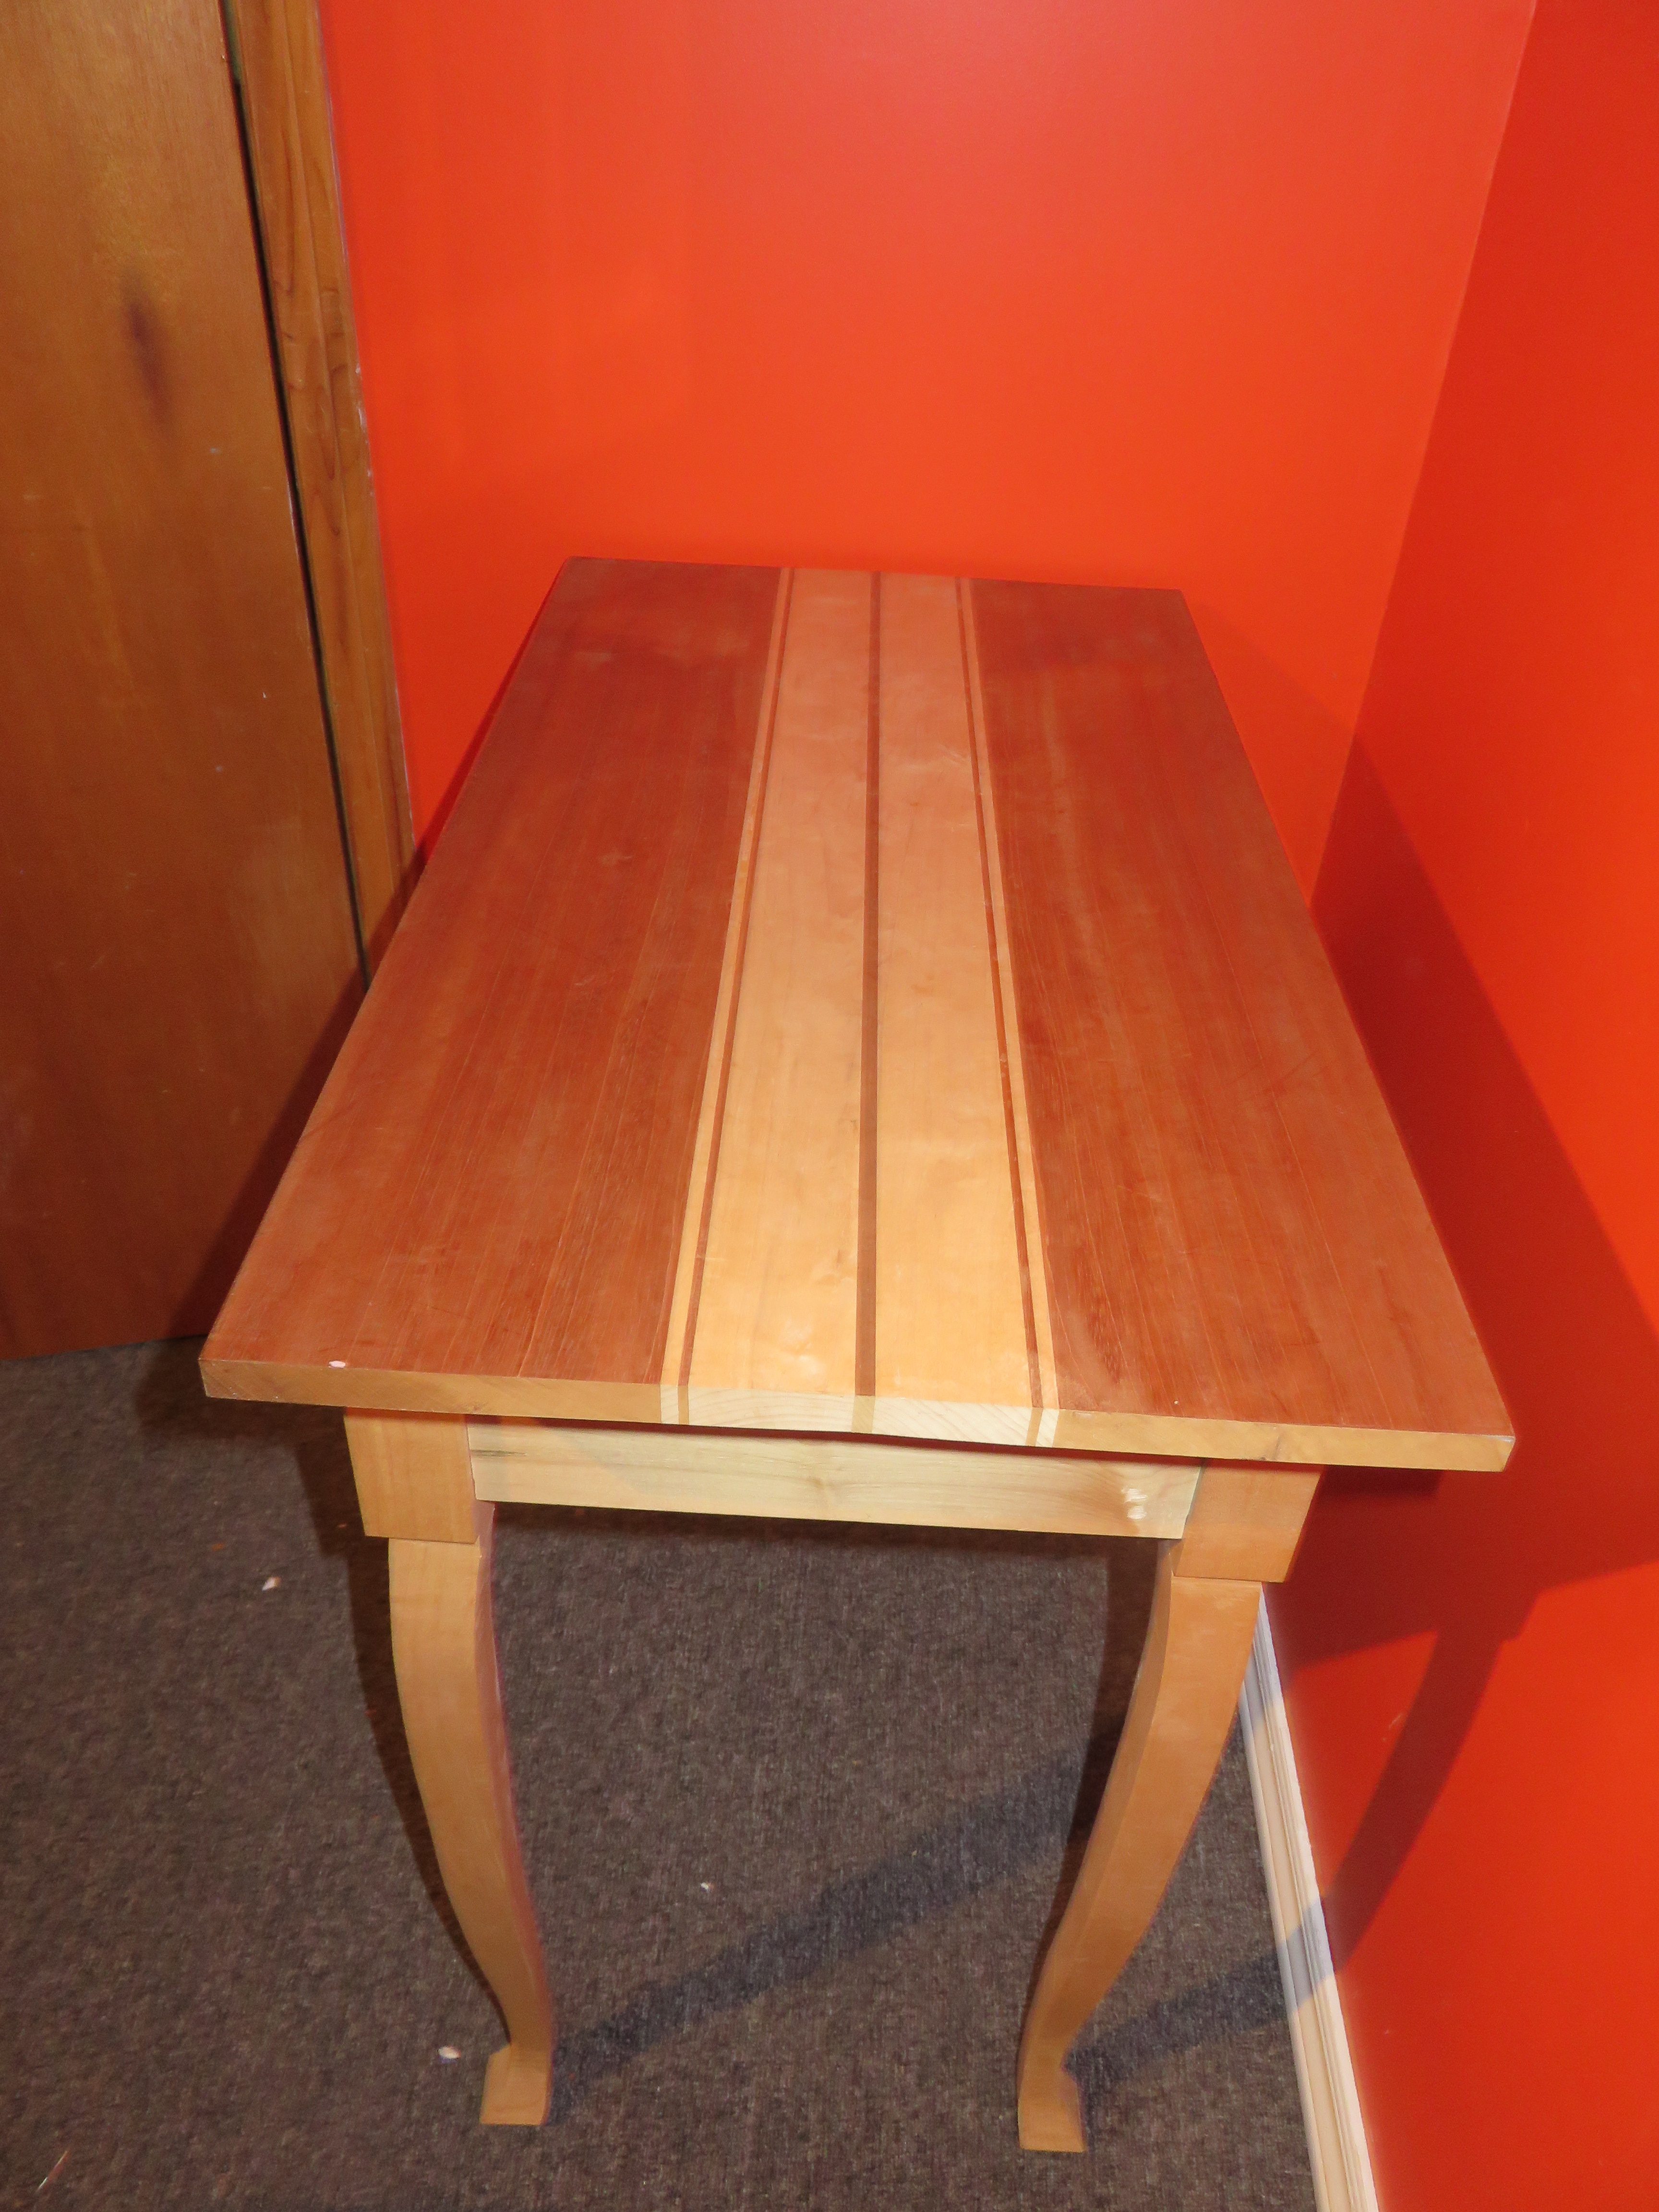
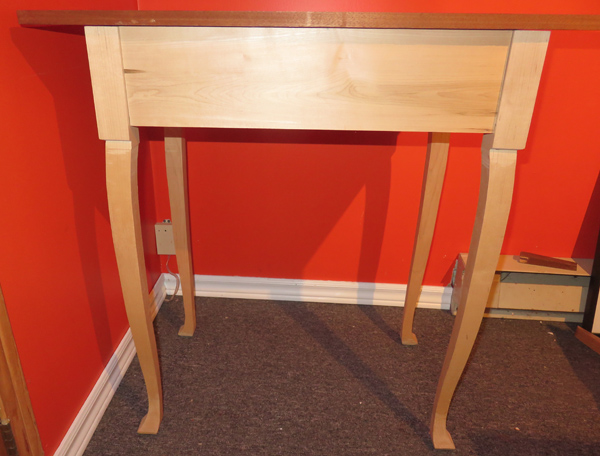
At 31″ h x 32″ w x 17 1/2″ d, this is a handy size for a small work table. In fact, its flexible size is part of the reason it has been somewhat forgotten. When we redesigned our workshop, we moved some projects into another room and this table became a storage space. It is hard to tell in this picture but there is even a table top from another project under those boxes.
The base is framed and I have completed the router slots for the table brackets (though I can’t seem to find the brackets; making a new set will have to be on the list for next steps).
-
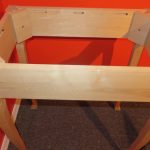
- Frame from top
-

- Side view
-
- End view
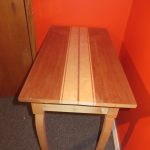
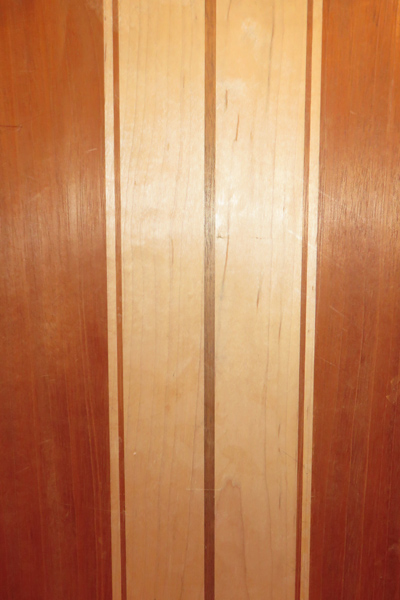
The view from the side and the end give a sense of the overall form. (Admittedly, it is not a great place to take the picture but it is has to do for now. These are taken in our fitness room which is in the basement and rather dark so we selected a bright, energetic wall colour.) The table apron and legs are maple, the top is padauk and maple with a thin strip of walnut. The top strips were glued and clamped. Here is a closer look.
The table legs are Queen Anne or cabriole style. The legs were certainly the most intimidating part of the project. However, with care on the preparation, they can be managed by a confident beginner (or even a not so confident one with some support from a mentor). Here are the general steps:
- Cut the leg stock and be sure that it is square. A slight discrepancy will magnify as you cut.
- Create or find a template to mark your legs. This will make the marking quicker and more consistent across the legs. Remember to include room to join to the apron.
- Mark the template on two adjacent faces of the leg. Placement is critical so care on this step is crucial.

Correctly marked leg stock.
Saved from woodcraft.com - Cut any joints or mortises on the back of leg before cutting the template; it will be easier when the piece is square.
- Make the preliminary cuts on the bandsaw. You might find it easier to cut the first side then use painters tape to secure the cutoff back in place so the second cut starts on flat surface. That is the way that I learned it but I did not have success finding an online demo using that approach.
- Round and finish the legs. You can do at least part of this with power sanders but I prefer using only hand tools. Working with a spokeshave or draw knife takes some time and requires patience but it is very satisfying as well as conducive to quiet contemplation.

Unfortunately, It was so long ago that I did the legs that I am unable to locate the pictures that I took during the process. Perhaps I will need to do another similar project and record the steps. Of course I mean AFTER I clear at least a few of my current works-in-progress. There are many resources available in books or online if you want to look at some pictures before tackling cambriole legs
Doing this more challenging design was very rewarding. It was a relatively slow process as it was the first time that I had tried these and I was admittedly relieved to finish all the preliminary cuts with matching legs.
I am quite happy with the legs and the table top to this point but there is still work to do including:
- doing final planing on the top
- making new brackets for the top
- shaping and smoothing the legs
- applying a finish
- sharing the finished project here
Now that I have revisited this project, I am eager to complete it. In fact, I think that I will head down to the shop and get out my spokeshaves to do some shaping of the legs. No time like the present.
What project will you move forward today?
Recent Comments